Copic Tutorial #2 ~ More Tips!
 Today I'm sharing another Copic Tutorial for Crop Stop! I recently purchased the Daisy Patch Bouquet image by Heartfelt Creations.
  I stamped the image with Memento Tuxedo Black ink and then used some of the new Copic markers to color my image. You can click on each image to read the steps I used to color this image.

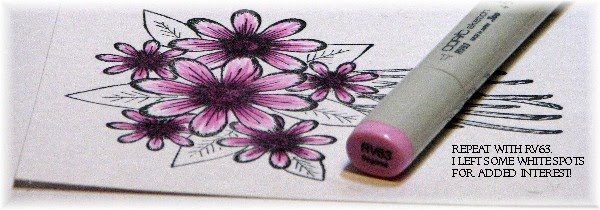
 As you can see...I didn't bother staying in the lines when I colored this image...I can get the image colored much more quickly and it's easier to blend this way. I planned to fussy cut this
 anyway so I could combine it with the Spellbinder's Heartfelt Creations Decorative Oval Window die.
 I have LOTS of ribbon in my stash...but sometimes I just don't have the one I wish I had! A great idea is to take a white one or a light colored ribbon and color it with your Copic Marker. In this instance, I had this pretty white Sheer Satin Band ribbon, so I simply ran my Copic Marker down it and now I have a perfectly coordinating ribbon!
  And since I do like Dew Drops, but I don't own every bottle in the store (yet....wink!), I used the same idea and chose some white/light dew drops and colored them to match my project with my Copic Marker. The easiest way to color these is to put them on your glue dot and then color them. I use my craft knife to then transfer them to my project.
 A few reminders for you....join in the fun on the CropStop Challenge Blog for a chance to win a generous prize!
If you are in the mood to shop...please feel free to use the Coupon Code CTMP-01 to save 10% on your order!!


Comments
Paula
Hugs
Lorraine x